Beyond the Tool String: Stem Guides and Wire-Line Savers
This Month, We Get into Other Cable-Tool Components
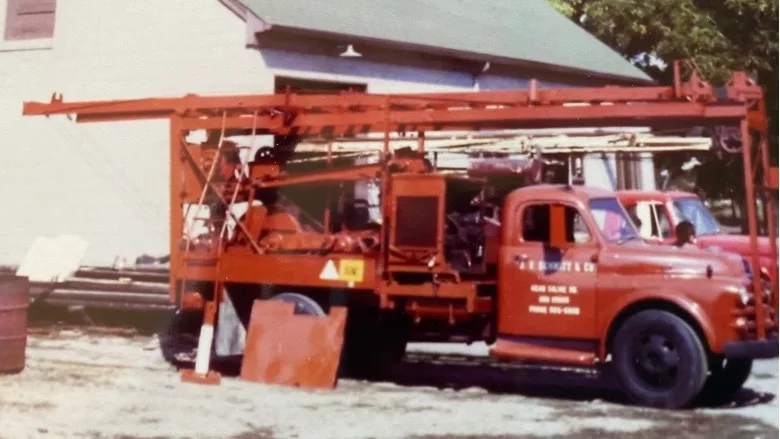
Columnist John Schmitt ran cable-tool rigs for years and has worked hard to document all aspects of the drilling operation.
Source: John Schmitt
In my last column, I finished up writing about a string of tools, walking through putting everything together tightening the joints. We assemble most of the string on the ground, and can then add the bit after raising our other parts to the vertical position.
One small but important part we need is a wire-line saver. If we pick up a string of tools with the wire line inserted into the socket, we will kink or even cut the line where it enters the socket. This can lead to very early line failure and, at the very least, bent or kinked line. I don’t have to remind readers of the dangers of a damaged drill line. To avoid this, we need a wire-line saver.
The wire-line saver looks like a one-quarter version of a wire-rope sheave. The saver guides the rope for 90 degrees. It is made so that a cylindrical part slides over the neck of the wire-rope socket. The neck on any socket is smaller than the main body. This provides a place to grab the socket if the tools get lost in the hole. (I will write more about this fishing procedure in later columns.) The wire-line saver slips over the socket neck and provides at least some radius to protect the wire line when picking up tools. These line savers come in a number of sizes to fit the necks of different sockets.
One key feature of these line savers is that they all have a slot in them so that operators can remove them from the socket and wire line. It is very important to remove the wire-line saver after raising the tools to a vertical position. Starting the drilling motion with the line saver in place is very dangerous and you should avoid it at all costs. The driller or his helper needs to climb the mast, remove the wire line saver, and either drop it to the ground a safe distance from any persons or objects, or lower it down on a wire or rope.
Once we have the drill stem in the vertical position and a bit attached, we can start drilling. I have always started with a short piece of casing set on the ground at the target location. By short, I mean 5 or 6 feet. Sometimes, you can add another 5- or 6-foot piece to give the operation a surface casing. You will pull this casing when the drilling job is complete. Water is added almost as soon as drilling starts, and the weight of the surface casing allows it to follow the drilled hole naturally by gravity, at least for a few feet. This surface casing keeps the area around the hole much cleaner when it follows the drill hole by gravity.
You can drive the casing into the ground using drive blocks, another item I will write about in the future. When driving this short surface casing, you attach the drive blocks to the lower square of the drill stem. When driving casing like this, only engage the spudder mechanism for a partial stroke and then return to neutral. Never use a full stroke of the tools in this position. You could also raise the tools a short distance, 1 or 2 feet, with the bull reel and then the reel brake. This allows the tools to drop, driving the surface casing. I always used a larger surface casing than the permanent casing. In other words, a 6-inch surface casing for a 4-inch well and an 8-inch surface casing for a 6-inch well. This requires the use of an over-sized bit for the first 10 or 15 feet of the hole, and then changing to the bit size of the permanent casing.
After driving the surface casing down the full length the oversized hole, in the right geology, could be run without casing — at least for quite a distance. There risk to that approach, however, involves the hole collapsing on the tools with the socket below the surface casing. You would face a difficult fishing job. I usually drilled down no more than 20 feet with the oversize hole. However, in one case I remember, I drilled to about 70 feet before I set in permanent casing and continued. In this instance, I had a lot of confidence in the ground conditions and considered the risk of hole collapse quite low. It is, of course, very important to grout between permanent casing and the oversized drill hole. Any grouting should be of an impervious material or it jeopardizes the safety of the final well.
When starting the hole, I find it handy to have a stem guide on the mast of the machine. Now, many drillers never use one of these, but I found it a very good attachment. The stem guide is, in effect, a short piece of pipe (perhaps 6-inches-long) mounted about 10 feet above the ground on the rig’s mast. This varies from rig to rig. A guide has a hinge that opens to allow the drill stem inside. The guide then locks shut, usually with a spring-operated latch controlled from the ground by a rope. With the tool string in the tool guide above, the surface casing below gets guided in a much more straight and safe manner (as opposed to just letting it swing free to be guided by hand). After enough hole has been drilled that the socket is below the stem guide, it is best to move the guide out of the way. It is not necessary anymore. The operator can then guide the tools by hand, if needed.
There are just dozens and dozens of tools that make up a cable-tool operation. Next time, I will write about more essential tools. I hope my terminology in this column has not confused you. If you are confused talk to an experienced cable-tool driller or contact my editor, who will put us in touch.
I write this column in very early March and we see a few signs of spring here in Michigan. We have had a rather strange winter, in that it would snow, perhaps heavily, I would plow it out and then the snow would melt. Then it would snow again, I’d plow and it would melt again, with the cycle repeating itself. We never did get super-cold weather (colder than -10 degrees Fahrenheit). As I look out the window at my infamous grass, it is all brown and dead or dormant. We have enough snow in a pile to make a few snowballs. Spring is coming for sure, but we probably won’t mow until mid-May. Until next time, work hard, work safe and try to enjoy life now and then in these unusual times.
For more John Schmitt columns, visit www.thedriller.com/schmitt.
Looking for a reprint of this article?
From high-res PDFs to custom plaques, order your copy today!


